This article discusses details on how to interact with smart contracts on Ethereum using Truffle and Infura. We will use a simple smart contract such as a storage contract to deploy and then interact or test the smart contract. To set up Infura, you can refer to my previous article here Setting up Infura account.It is a prerequisite that you set up an Infura account and create a new project with a meaningful name (I have used the name “storage”).. Note the PROJECT ID and PROJECT SECRET, as it will be required later, and in the endpoint option-select Ropsten as we will deploy it on the Ropsten test network. With these prerequisites let’s begin the journey!
Table of Contents
Tools to install
As a first step, it is foremost to have these tools installed on your system. The first one is node.js and npm. I use the nvm script to install node.js and npm as nvm is suitable for any POSIX-compliant shell on Windows, Linux, and macOS. In case of a problem during installing node or npm, you can use the link NVM to debug the issue.
$ curl -o- https://raw.githubusercontent.com/nvm-sh/nvm/v0.39.0/install.sh | bash

# To download, compile, and install the latest release of node, do this:

$ nvm install node # "node" is an alias for the latest version
The next tool is Truffle. To install the same use the below terminal command. For details on Truffle, visit TRUFFLE.
$npm install -g truffle
The other software we will install only when needed later. At this stage, we are good to go.
Smart Contract
Let’s write a simple storage smart contract that stores and retrieves a string name. Simple example storage.sol is given below.
// SPDX-License-Identifier: GPL-3.0

pragma solidity >=0.7.0 <0.9.0;

/**
 * @title Storage
 * @dev Store & retrieve value in a variable
 */
contract Storage {

    string name;

    /**
     * @dev Store value in variable
     * @param _name value to store
     */
    function store(string memory _name) public {
        name = _name;
    }

    /**
     * @dev Return value
     * @return value of 'number'
     */
    function retrieve() public view returns (string memory){
        return name;
    }
}
The logic of the contract is very simple. The contract has two functions store() and retrieve() the string name.
Setting up environment with Truffle
The Truffle has the provision to test smart contracts on local blockchains, Ethereum mainnet, or testnets such as Ropsten, Kovan, or Rinkeby networks. The first step is to set up the truffle project. In the storage directory, initialize Truffle as below.
$ truffle init
In the storage folder, Truffle creates three subfolders (contracts, migrations, and test), and a truffle config file as seen below.
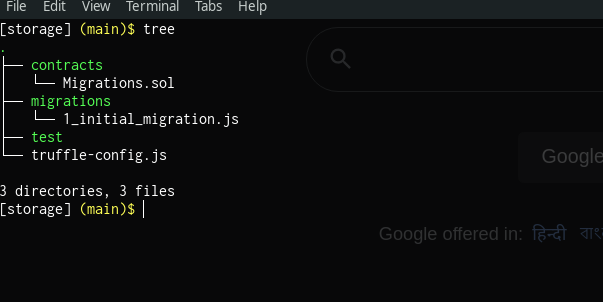
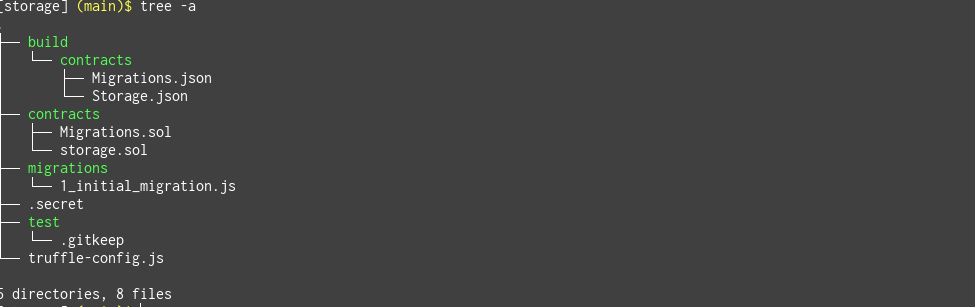
Copy the contract file storage.sol that we developed above to the contracts folder. Migrations are JavaScript files that help you deploy contracts to the Ethereum network. The file 1_initial_migration.js deploys the Migrations.sol contract to the blockchain. At present we do not have to worry about this file as this is used internally by Truffle.
Compilation
Before the smart contract is deployed on the blockchain, it must be compiled. To compile the smart contract, in the file truffle-config.js, enable the solidity compiler version section and change it to any latest compiler version. I use 0.8.9 as the solidity compiler.
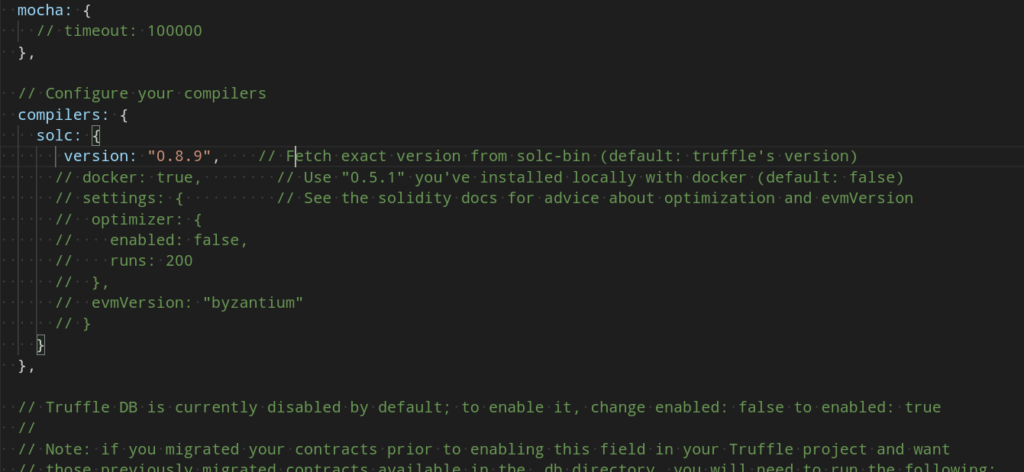
You can now compile the smart contract to rule out any compilation errors as below. It generates a build folder after successful compilation.

Deploying Contract
To deploy the smart contract on the Ropsten test network using Infura needs further changes in the truffle-config.js, given in order below. It is a bit laborious work, yet if you do it once, then replicating it for complex contracts is very easy as it will almost be a copy-paste of the tasks mentioned here.
Enabling HD Wallet
Enable the HD Wallet provider connector option, as Infura uses this as a provider to communicate with its APIs.
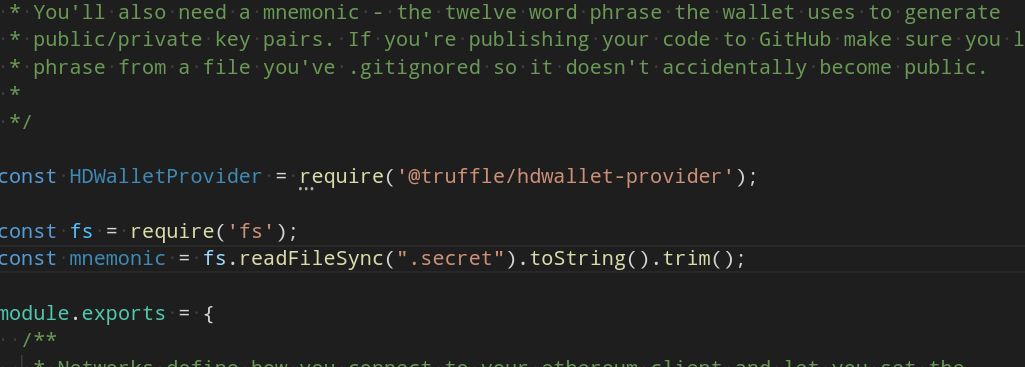
Generating .secret file with mnemonics
As noticed above, the HD-wallet provider needs a twelve-word mnemonic to generate public/private key pairs using Infura. To spawn a twelve-word mnemonic, use the link MNEMONIC, select option 12 in the GENERATE tab, and click on English. It generates the twelve-word mnemonic, and this is your secret code which you must store in a file “.secret” inside the storage folder. Do not share this with anyone as then anybody can access your Infura account.
Enable Ropsten network
Enable the Ropsten network part in the truffle-config.js file as we will deploy it on this test network.
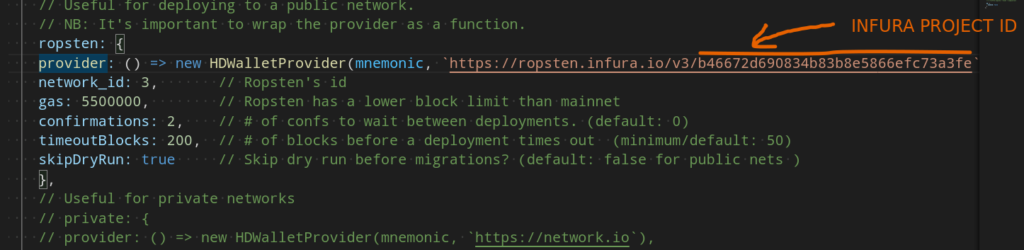
The gas price used is the default provided by Truffle. You can experiment with it to find the optimal gas price when you deploy. For this demo, we will use the default value. You need to provide the Infura PROJECT ID (see above figure, after v3/INFURA PROJECT ID) that you created as part of the Infura project.
NPM package for hdwallet
Install npm package for a hdwallet-provider in the same folder as storage.

Migration file for contract
Create a new migration file in the migrations folder and name it 2_deploy_contract.js. The contents of this file are the same as 1_initial_migration.js, but with a small change. You need to provide the contract name that you want to deploy in this file. The contents of 2_deploy_contract.js as below.
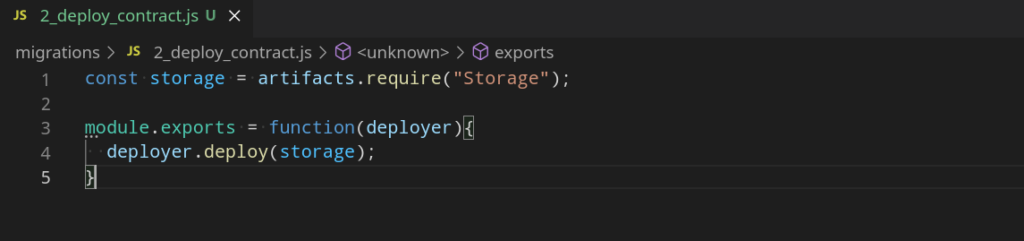
In the above code, I have used the contract name “Storage” in artifacts.require(). This file is basically deploying your contract using the deployer.deploy() API provided by Truffle framework.
Get account balance
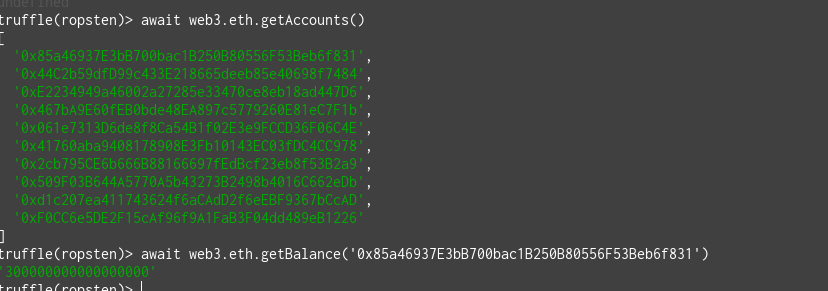
By default, Ropsten provides you with ten test accounts with Infura. At this stage, before calling deploy, it is important to connect to the Ropsten network and check the account balances. See below commands.
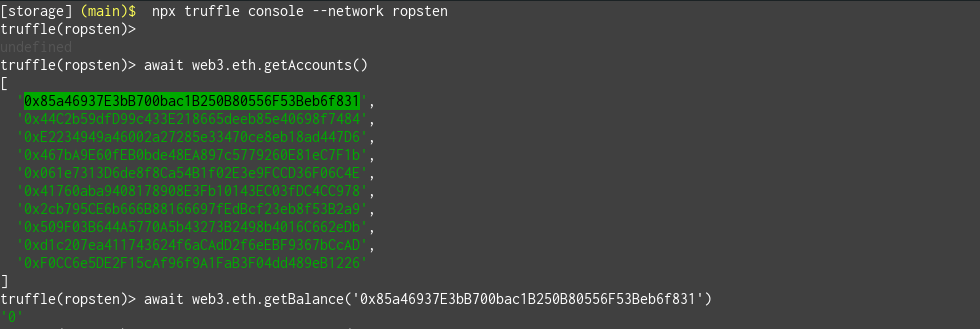
As seen above, there are ten test accounts (Note: yours will have different values, as they depend on the mnemonic used), and with getbalance() it shows the amount as ‘0’. This brings us to the next step to fund our Ropsten accounts.
Funding your accounts
We can make a request at the Ropsten faucet to provide us with some fake Ether by giving our account number. In this case, I will use the account ‘0x85a46937E3bB700bac1B250B80556F53Beb6f831’. See below figure. Once the “Send me test Ether” is clicked, the request is queued and after some time it gets approved and the account is allotted some test Ether. The test Ether is needed because you need to pay the gas price when you deploy and interact with the contract.
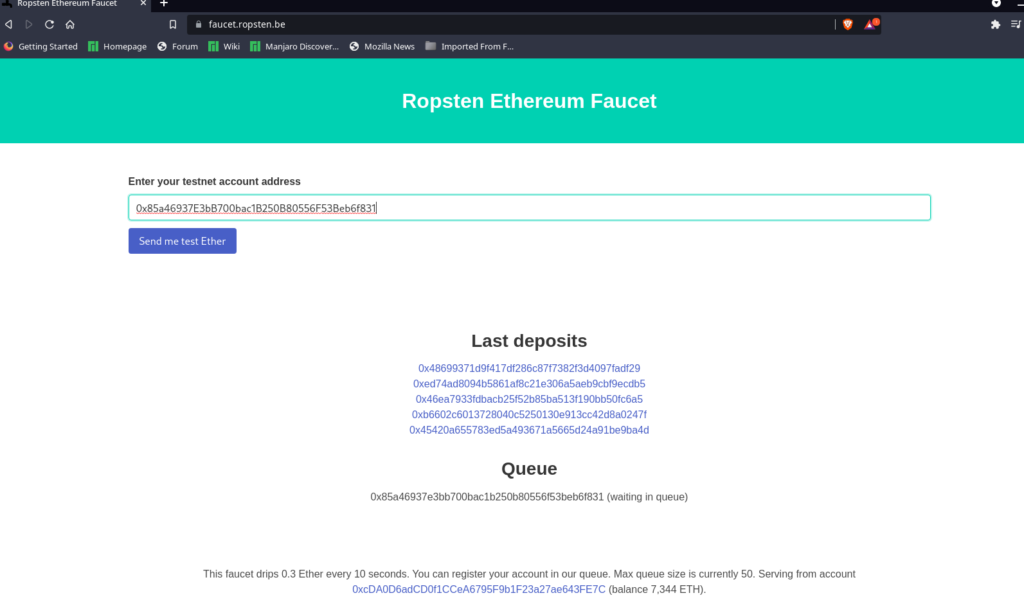
You can check the balance again and see if the test Ether is allotted to the account.
Now you are set to deploy and test your smart contract with Truffle.
Deploy contract
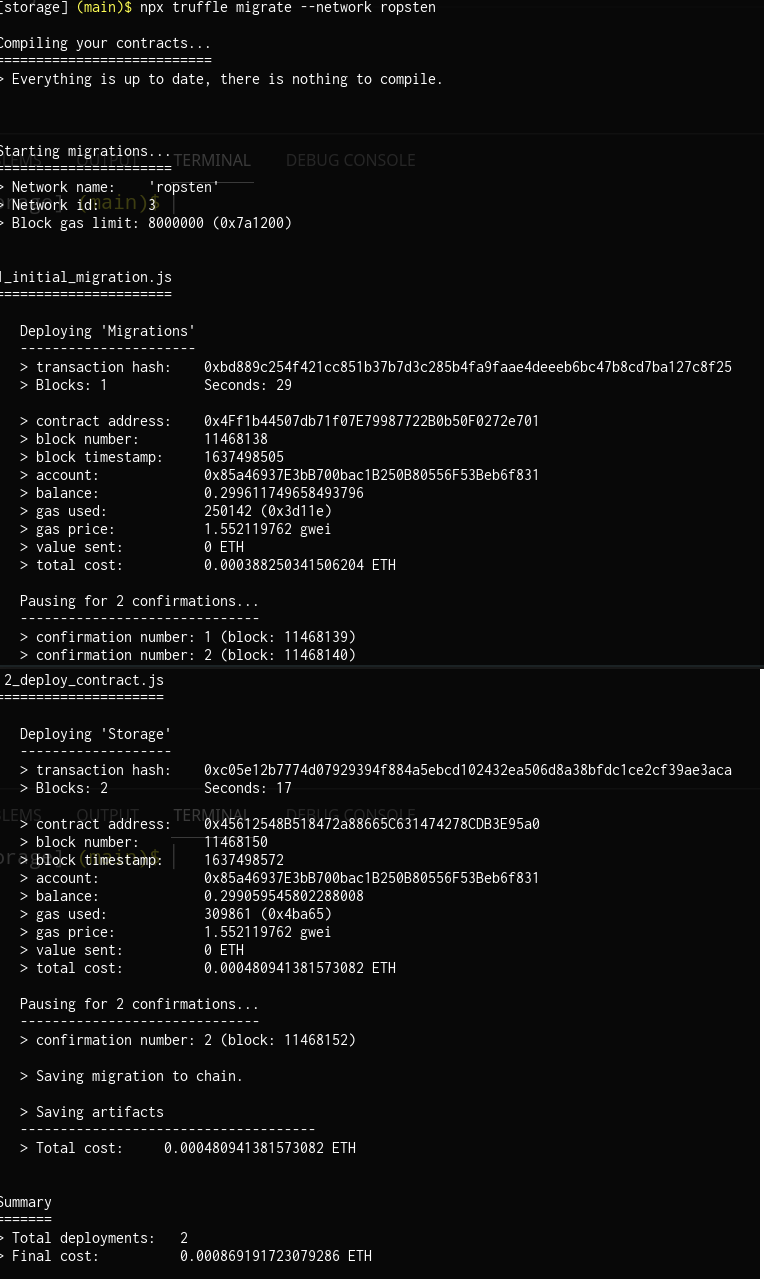
Exit the truffle console and switch back to the regular console (press Ctrl-C twice) and deploy the contract using the below command. Wait for a few seconds and you can see the contract gets deployed on the Ropsten network.
Confirming deployment
Finally, to confirm if the deployment was successful you can visit the Ropsten Etherscan and confirm it with either the transaction hash or the source address (in this case ‘0x85a46937E3bB700bac1B250B80556F53Beb6f831’). You can see all the transactions confirming the deployment of the smart contract. See the below figure in this case.
As seen in the figure, you can click on the Contract Creation or the Txn Hash to see more details of the transactions. This confirms the contract was successfully deployed on the Ropsten network.
Testing the Contract
Now as the contract was successfully deployed, we can start testing it on the truffle console. For the same, we first get the deployed instance of the contract using the deployed() function, and then it is possible to interact with the contract functions.
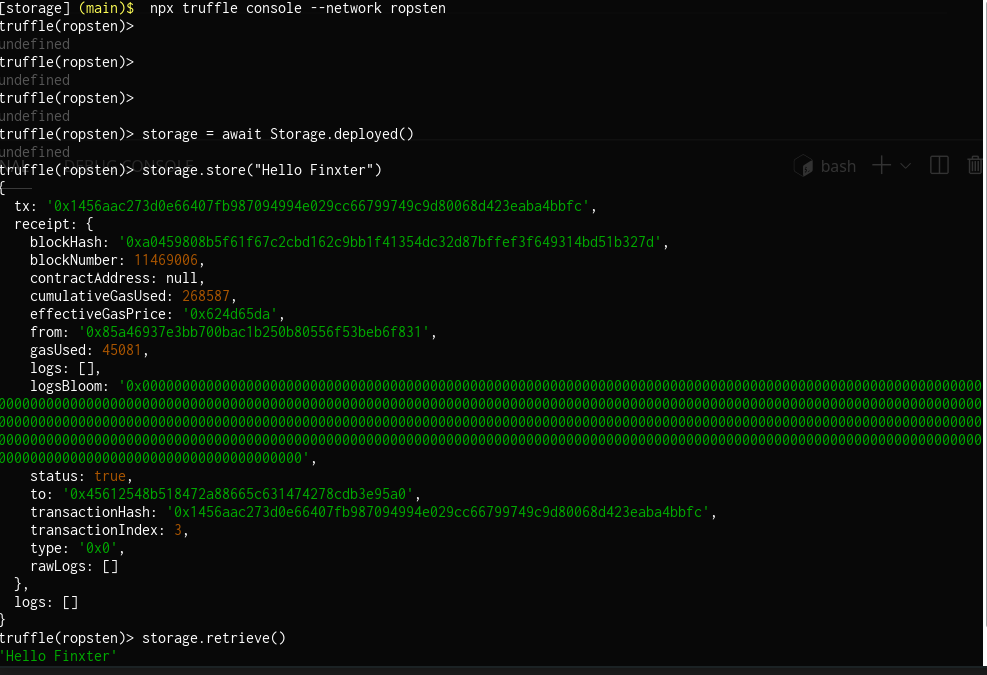
Using the deployed instance, the store() and retrieve() functions of the smart contract can be called. You can observe that storing results in a transaction while reading or retrieving does not.
Summary
This post covered a hands-on experience using the Truffle framework and Infura to connect to a Ropsten testnet and interact with the contract. The same procedure can be utilized with the mainnet or other testnets such as Kovan or Rinkeby with some minor modifications. Using the respective Etherscan (in this case Ropsten Etherscan), you can confirm all the transactions done. The advantage of using Truffle is the ease of deployment and testing the contracts. Other techniques include using web3.py or web3.js, where you can directly deploy and test contracts on any of the blockchain networks. However, the Truffle framework makes the life of the developer or tester much easier as it provides pre-configured files for the mainnet or testnets.